|
|
|
|
| Contents | ||
|
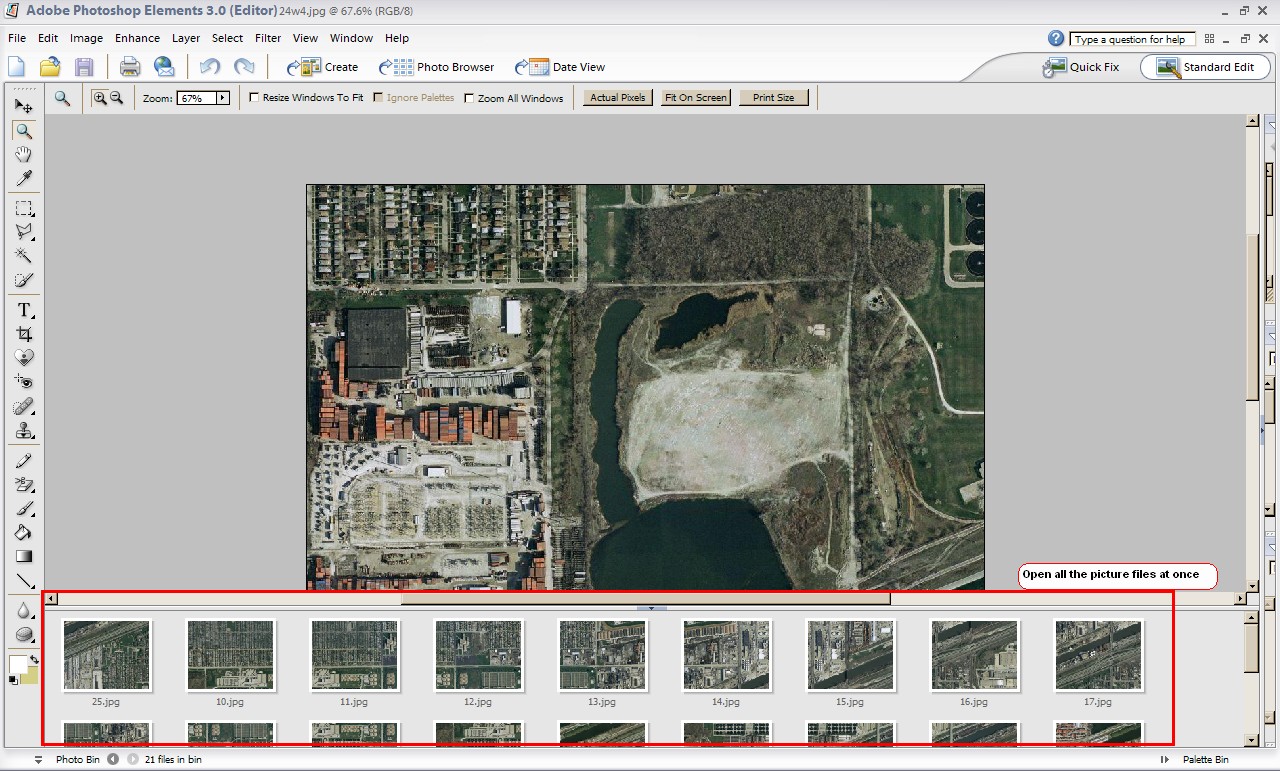
In this Clinic, we will show you how to makeyour own photo composite based layouts to use in TrainPlayer. For you to be able to do this task, you will need, as a minimum, an Internet access to get the necessary photos, a photo editing software to create the merged composite picture and a plan of attack. We will be using the TerraServer as our document base because all of its photos are in the public domain. You can access this database here: www.terraserver-usa.com/ When you first go to the TerraServer website, it will be most beneficial for you if you have an exact street and city address of the area that you would like to see. The TerraServer presents you with several views including topographical, aerial and urban - all with some date lines associated with them. For TrainPlayer, your best choice is the "urban areas" which are in color for the most part. Remember, the major urban centres in the USA are fairly well covered in this data base but some major railroad towns are NOT! This is what the one of opening screens may look like in TerraServer. 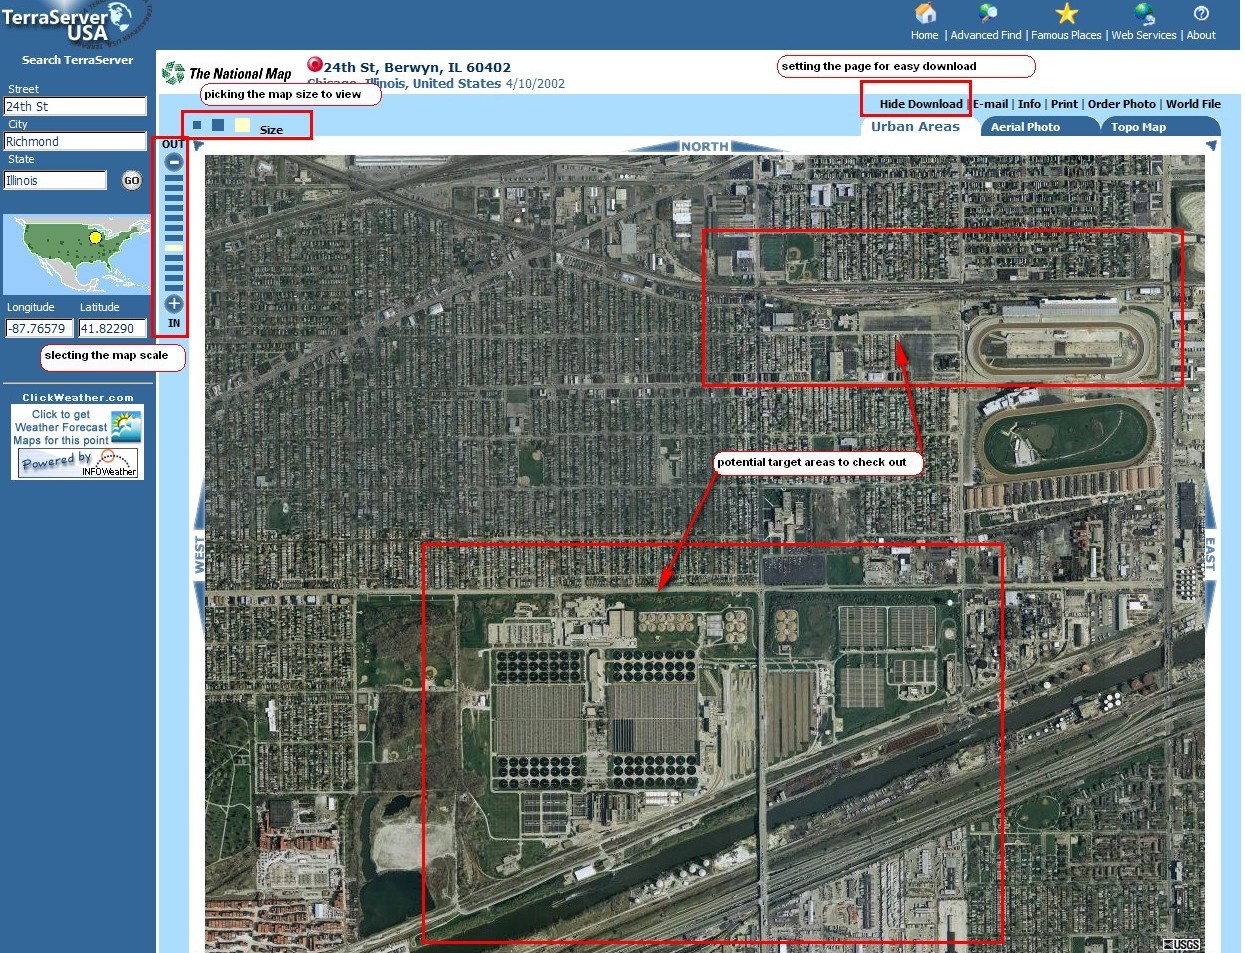 Making the Best Use of TerraServer To begin, look at the red boxes in the top left of the photo above. The box in the top left corner with the 3 squares allows you to set the size of the viewing area; select the largest size. The left hand box with the +/- allows you to set the focal point for depth and zoom. Initially you may want to set it at the fifth notch above the + sign since this will give you enough depth of scene to spot large rail yards and points of interest. We have made two large red boxes to illustrate a couple of points on this photo that would be worth looking into. Before you start to drill down further, click on the "Download" box above the "Urban Areas" tab. This will allow you to more easily save your detailed pictures when you're ready.
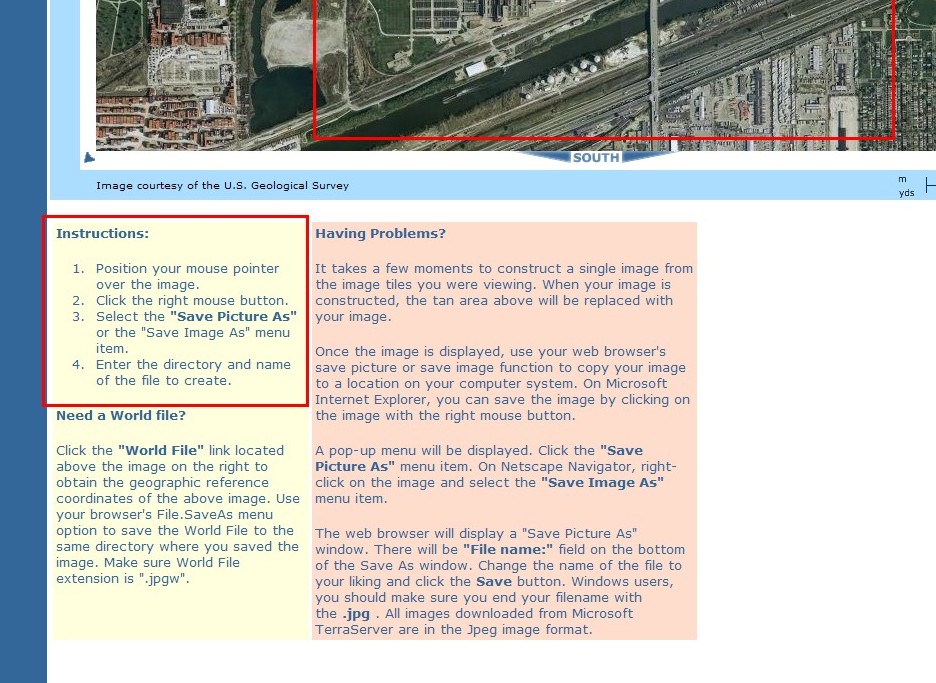
At the bottom of the page, TerraServer gives you some instructions on how to actually save these photos. We prefer the method as expalined in the red box above. I always create a new folder on my Windows desktop with the name of the city I'm working on as an easy reminder. Another tip before you start saving your photos - plan the scene depth you want to work with and plot out your photo coverage plan. First set your scene depth:
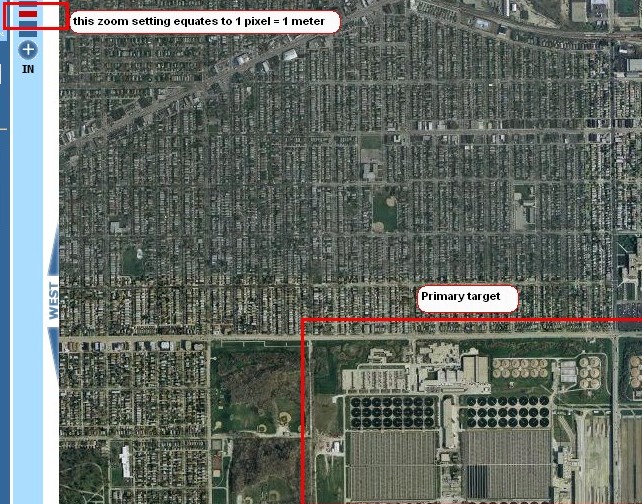
Before moving on to the 1 pixel = 1 meter depth, mentally plan out your photo coverage. Here's an example:
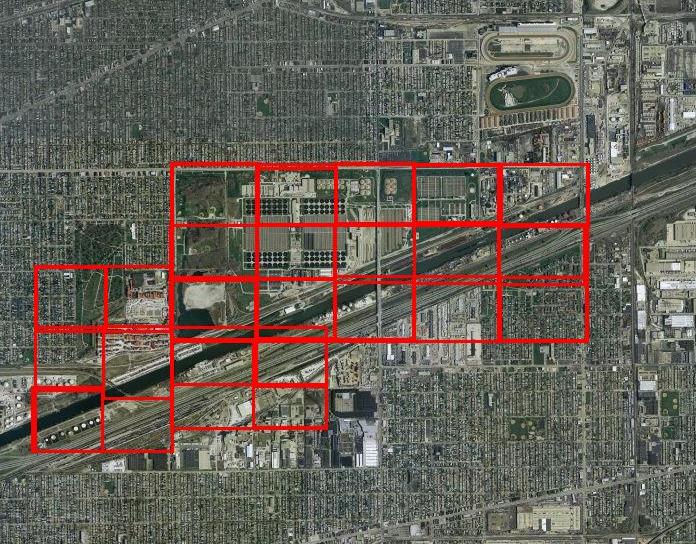
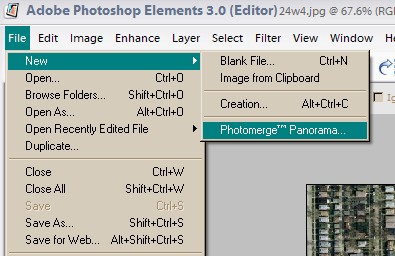
At this level 1 pixel = 8 meters, it looks like we will need to use a flexible gride of 5 screen widths by 4 screen widths - a total of 25 photos to adequately cover this water filtration plant and some nearby industries . Typically an easy naming convention would be: top left photo is saved as 1.JPG, next one to the right as 2 and so on until you get to the edge where you want to stop. The beauty of the TerraServer site is that it automatically moves you one screen to the right when you press the EAST button. Not only that, but it also provides about a 25% overlap in the photo which your photo editing software will need to "match" all these photos. Once you reach the end of your row, you can click on SOUTH at the bottom of the picture frame, to go down one row. We suggest saving this photo as a variation of the previous. In other words, if your row ended with photo 5, the first picture SOUTH, would be saved as photo 15. The reason for this is so that you can easily remember that it is the first photo below #5 or 1 - 5. This may prove useful if you photo editing software cannot easily merge the total photos and you need to do it manually. Now remember, this time we are going WEST, 1 screen at a time so the next photo is #`14 and so on. Once you have completely captured the photos you require, close your internet connection and open up your photo editor software. Our photo editing software of choice is Adobe Photo Shop but you can use literally any one you choose so long as it can produce either a "photo composite" or "photo panorama or merge". The directions below all apply to the use of Adobe Photo Shop.
Step one is to "open" all of the photos associated with Berwyn
IL.
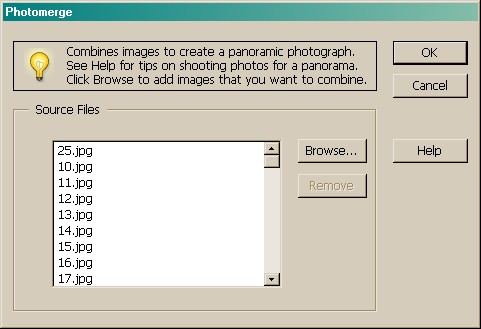
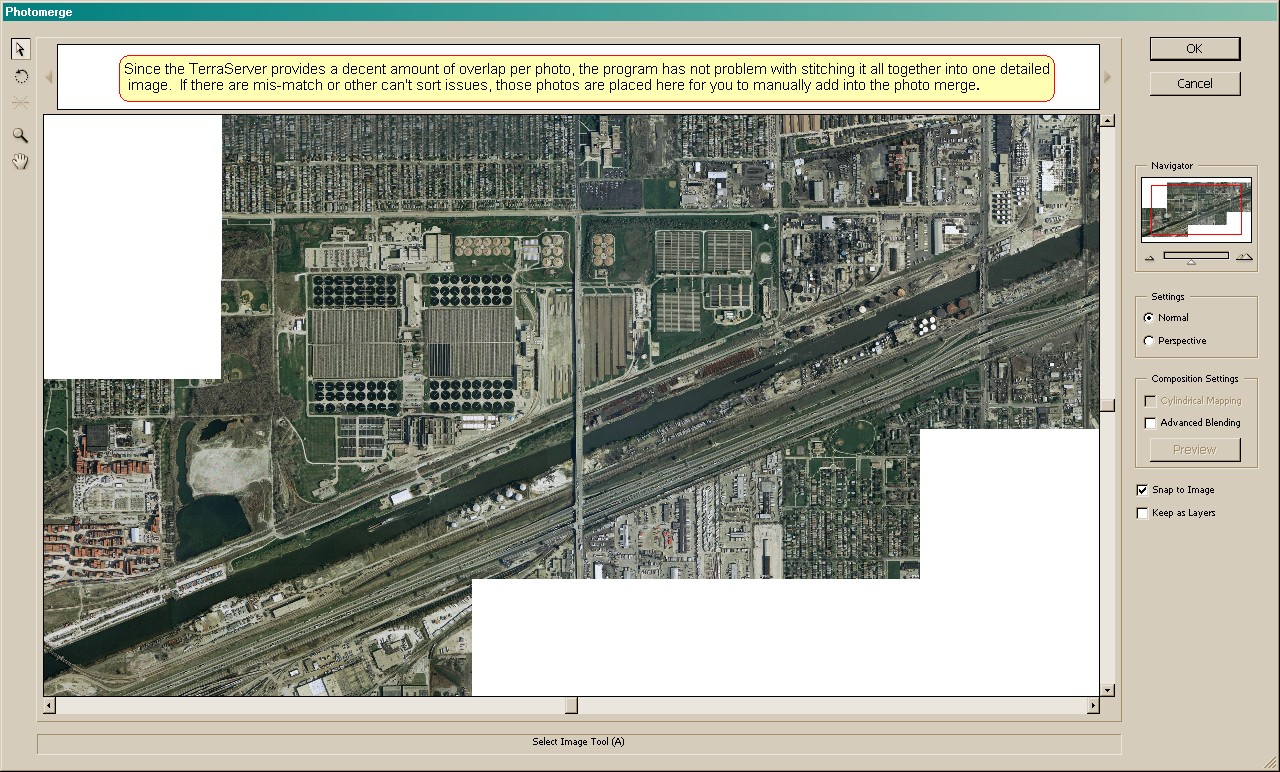
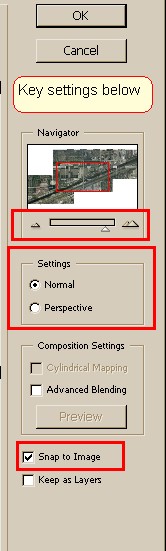
The Adobe program then lists all of the images it will use to create the photo merge itself Since the TerraServer provides for a good amount of overlap in your photos, a good photo editor will not have much trouble finding the "common elements" and assembling the larger image, after it has done some serious crunching of data. TIP: the more RAM memory you have on your computer, the faster this part proceeds
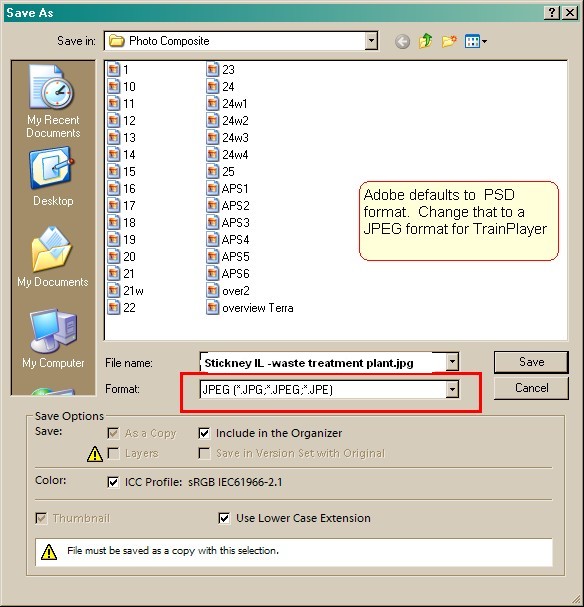
If you're particularly pleased with any photo composite that you've created, please send us a copy of your photo and the related RRW file to support @trainplayer.com and we will post your work on the Web Layout chooser for all members to admire and use Final Thoughts Once you have mastered these merging techniques with the TerraServer, you will want to try the other popular map sites - Google, Microsoft Live Search, Bing, etc. To make photo composites using any of these data bases, you will need to purchase a good "Screen Capture" software. You will also quickly realize that using these sites is much tougher since there is no automatic overlap between pictures and controlling the image size while scrolling around can be a challenge. But, the end result can be more up-to-date images and even greater details. Enjoy the challenge!
|
|
| Copyright © 2005 - 2014, TrainPlayer Software |